
July 2004
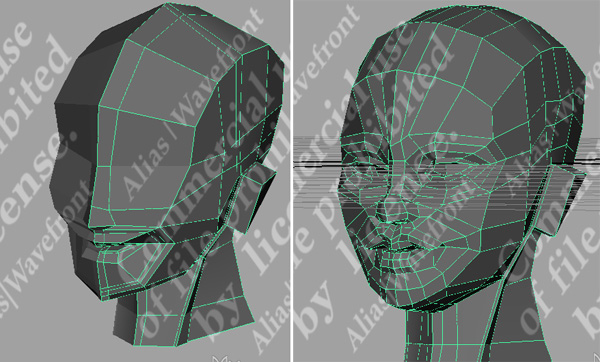
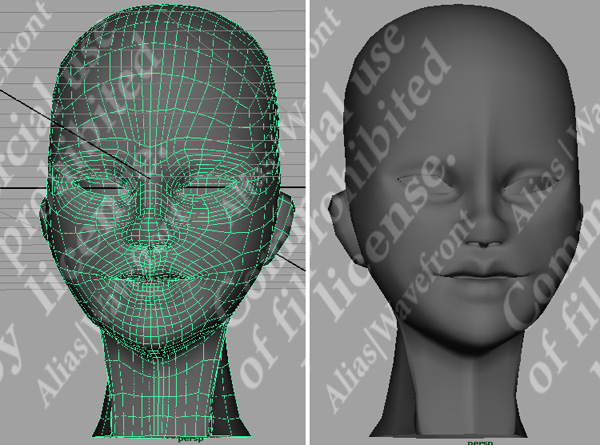
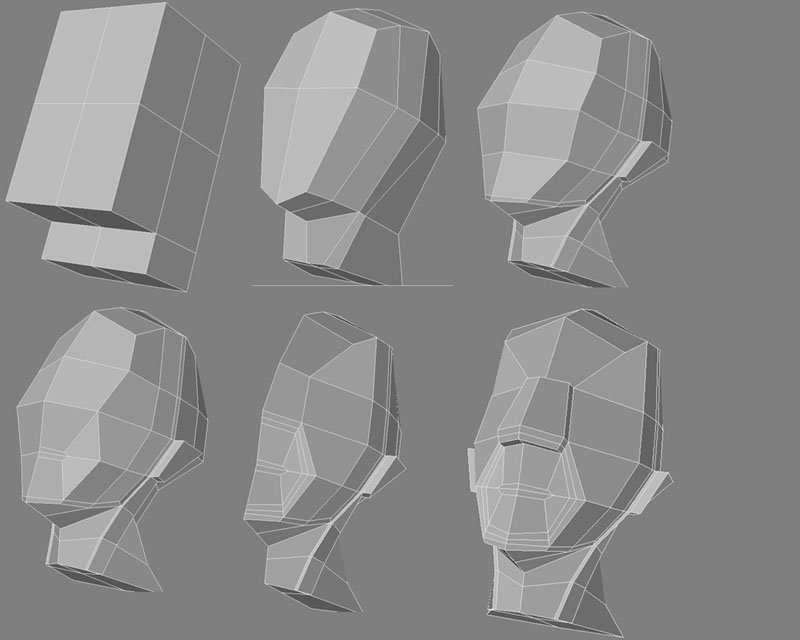
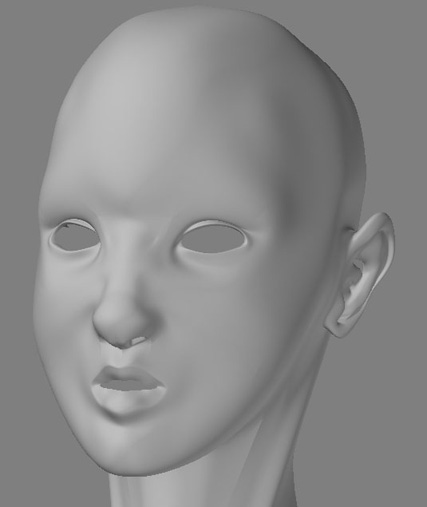
I'm learning Maya from the Personal Learning Edition version. The images below
show my attempt at box modeling in Maya. It's not a finished model but a test
for ease of use and timing. The ability to select and edit edges of polygons
makes it easier to adjust edge loops and reshape areas of the model.
The early stages took about one and a half hours. Adding more detail and reworking
areas took about five hours. The technique used is based on a tutorial at Maya3d.dk by Mikkel Jans.
|
|
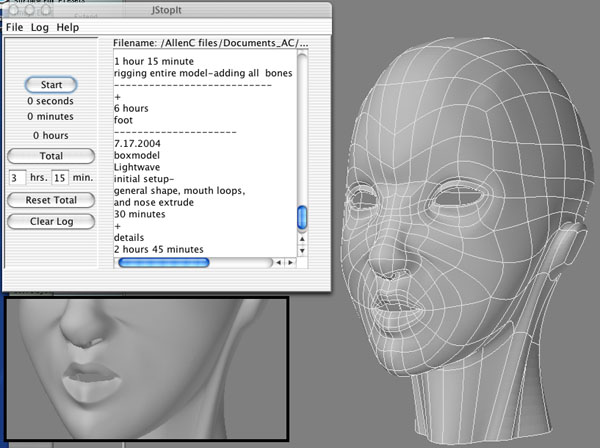
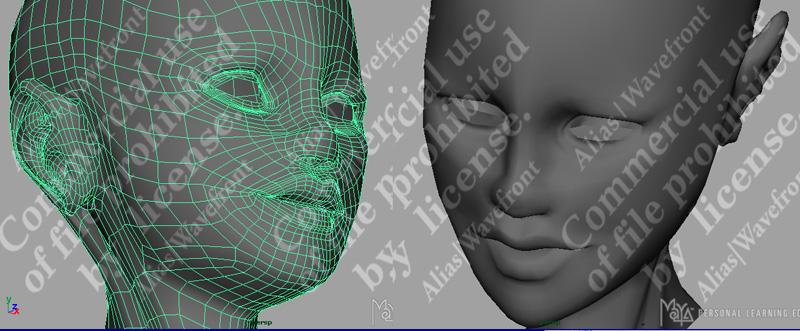
After repeated practice, I was able to cut my time in half to a little more than
3 hours. I also tried the same technique in Lightwave.
|
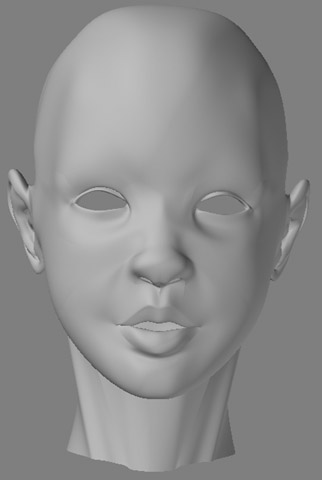
It takes me about 2 hours to model a not-so-perfect ear. In most cases you can save time by
attaching a previously modeled ear to the head. If you use the attach method on a regular basis, then a year later
it'll probably take you 2 hours to model an ear from scratch. However, if you model a new ear with each new model,
then you'll probably reach a point where it takes you about 30 minutes to complete the ear.
Note that if using the Maya3d.dk tutorial, I'd suggest omitting the neck muscle extrusion or at least moving
it so that it starts behind the ear shape instead of directly under the ear.
 |
 |
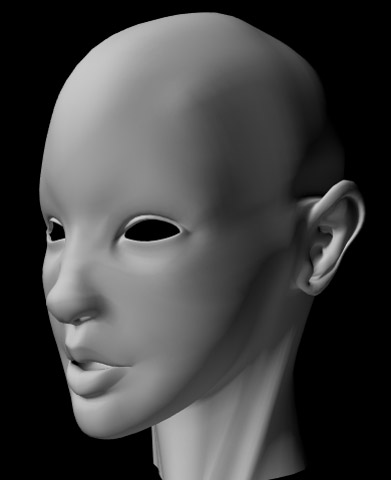
Including the ear and more tweaking, the Lightwave head took 8 hours.
The area between the eyes could use a little more adjusting and maybe move the ear forward a little.
 |
 |
One tip to anyone learning from tutorials:
Do it more than once. Do it more than twice. Do it until you can finish
a model without having to look at the tutorial for reference.
Transition from Lightwave to Maya
I'm not tossing Lightwave into the trash anytime soon. Just decided it can't
hurt to learn more than one 3d package. Below are examples of how
Maya implements certain features.
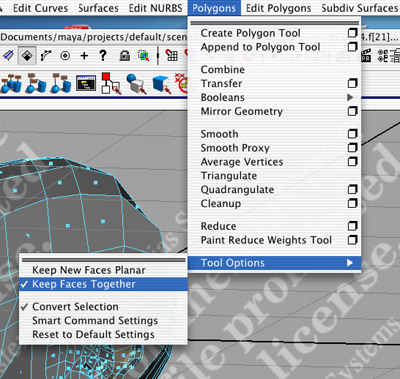
| In Lightwave, smooth-shift extrudes multiple polygons as one solid unit.
In Maya, the Extrude Faces option does the same thing if Keep Faces Together is enabled in the Polygons menu Tool Options. Splines are NURBS in Maya. Use the EP Curve Tool or the CV Curve Tool to create NURBS curves. To weld points, use Merge Vertices in the Edit Polygons menu. Clicking on the small boxes on the right side of the menus accesses options for the menu item. The Cut Faces Tool is similar to Lightwave's Knife tool. The Split Polygon Tool is similar to Lightwave's Add Edges plug-in. |
 |
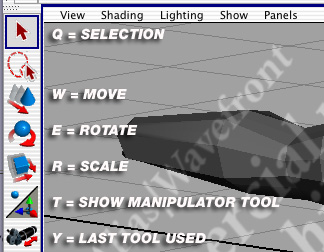
| One major difference in Maya is the use of icons instead of Lightwave's labeled buttons. Pictured are the main transformation tools along with the hot keys (keyboard shortcuts) known as the "qwerty" keys. |
|
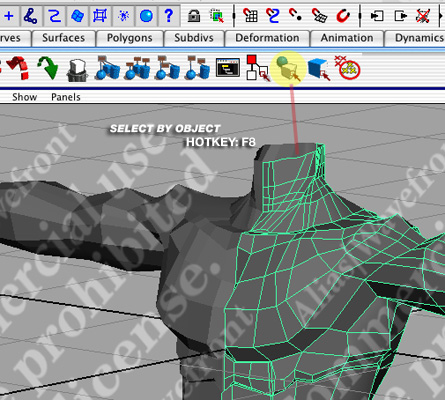
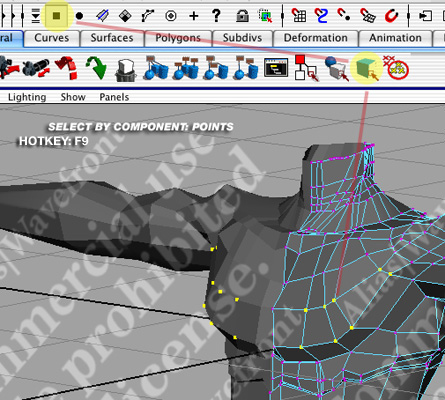
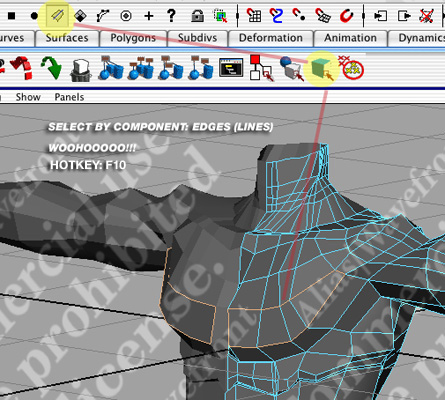
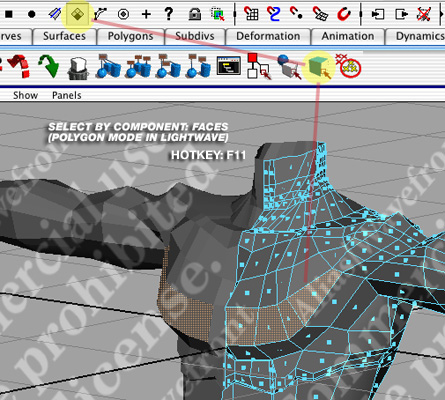
| Selection modes in Maya | |
|
|
|
|
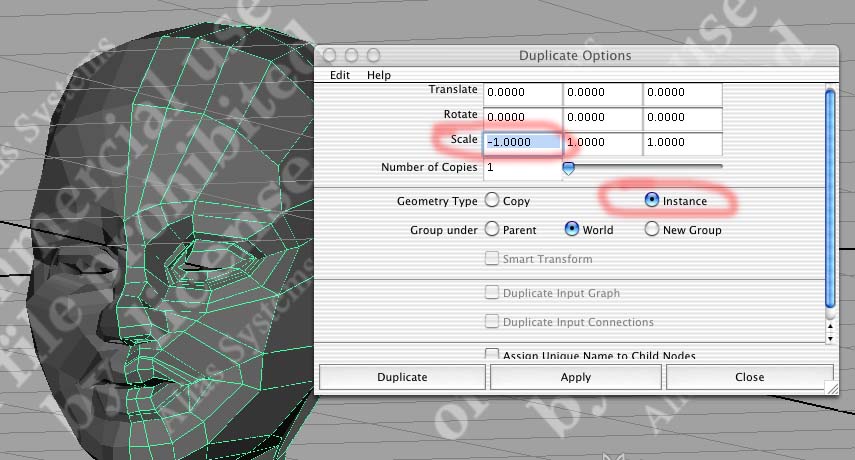
In Lightwave, Symmetry mode allows you to edit one half of a symmetrical model
and the other half updates to reflect those changes.
In Maya, the same feature is achieved through the Duplicate options. Setting
the scale to a negative number creates a mirror copy. Selecting the Instance option
creates a copy which is updated whenever the original is edited.
More
Home Sketches 3D Art